Saturday, May 12, 2012

Martha Stewart Madness!

Ever since I was a little kid, my parents have made fun of me because I get excited about the weirdest thing: office supplies. I LOVE OFFICE SUPPLIES. And let me tell you, I love Martha Stewart. So as you can assume, I have been so impatiently waiting for Martha Stewart's line of office supplies to come out! I literally went to Staples every week to see if it was out yet! 


I got a few things....and it's perfect because her office supplies are light blue, and my office is green:


Vertical file folders...genius! I have a magazine filer that is really pretty (it's wire and it has flowers on it!), so I thought some vertical file folders would be perfect, especially for all of my school documents (such as my transcript).


Small binders with small page protectors. I got these because I figure it's PERFECT for a recipe binder (you know, all of those note cards with your recipes on them....put them in these!) and also because I am a Mary Kay Consultant, so I put my receipts from orders in them. 


So far, that's all I have gotten...but I will be getting more once the fall semester starts up! Now that school is out, I am going to show you my disastrous office and how I'm going to reorganize. I still have all of the cards from my wedding almost a year ago...yikes! They're just in a pile in there! Check back next week!

Wednesday, April 25, 2012

Finals Week and Our Vacation

I said almost two weeks ago that I would update everybody on my vacation, and I failed to do so....woops! Spring semester at the University of Montana is almost done, so I have been working on final projects and studying, and things at the resort that I work at have picked up quite a bit. There is never a dull moment needless to say! 


So, to keep my promise, here is what we did in Seattle for spring break:


We visited the famous Pike's Place Fish Market on the first day. There was a ton of shops (the market is 3 levels!), and of course the real fish market (the guys that throw the fish), and also the Gum Wall in Post Alley:


Then we shopped around downtown quite a bit, and went to a really good restaurant for Casey's birthday called the Scotch & Vine. It was a small place, but it had a ton of wine and scotch! The food was great, too. 


Just above Pike's Place, there is a restaurant/brew pub called Pike's Place Brewery. They have a really popular beer called Kilt Lifter, and it's actually pretty good! We had a blast there, and they had excellent food (probably the best we had during our entire trip).


Then we visited the Columbia Center Skyview....it's twice as tall as the Space Needle, and half the price! It's gorgeous up there, with an amazing view of the water and the city. 


We did Bill Speidel's Underground Seattle Tour:


 Then went to the butterfly atrium at the Pacific Science Center next to the Space Needle. 
It was a blast, and we definitely wore ourselves out! It's been good to be back and in the swing of things...now I just need to finish this semester up and get to cleaning! Later this week, I will share with you what I got from Martha Stewart (I love that woman)!

Saturday, April 7, 2012

How to: Make Your Own Fabric Box

Right now, I should be busting my butt on some accounting homework. So here I am, blogging! 


A huge part of being organized is bins....we have gone over this. You take everything out of the cluttered space, throw out what you don't want/need, and you put it in a bin, then label it. Fabric bins are a great way to organize in a place that people can see (living room, kitchen, bedroom, etc.). And you know what? I'm not going to lie to you....fabric bins can be expensive, especially the nice heavy-duty ones! So I kinda was racking my brain on how to make one, then I found this lovely little box:


I thought it would be great to try and make a fabric bin out of, because the cardboard is pretty thick and sturdy, and it also has handle holes! I bought some fabric that I thought was versatile in all of the rooms of my house, and I measured it and cut it so that it would fit one side of the box. To adhere it, I used Elmer's spray adhesive that I found on sale at JoAnn Fabrics.


Then I finished all four sides of the box, careful to wrap the fabric around the bottom and inside edges slightly to that it looked uniform on the outside:


That's as far as I have gotten for now! But I must say...not bad for a homemade fabric bin. I'm going to fabric the inside as well, so we will se how that goes! Then I'm going to cut out the holes in the sides for the handles, and hopefully it holds up! It's been over a week since I got this far, and it has held up beautifully! Updates to come soon....  :)

Friday, April 6, 2012

A Lovely Little Spring Break

In case you didn't notice...I've been gone all week! I was lucky enough to have a whole week off from college, and April 1st was Casey's birthday, so we decided to visit Seattle. It was so fun! We went to Pike's Place Market, the Gum Wall in Post Alley, the Columbia Center Skyview, Space Needle, EMP, Pacific Science Center, and many many other places. I absolutely love it there! It was sunny and warm almost the entire time, so we totally scored in the weather department.


Later this week, catch up with me and I will tell you all about our adventures there!

Tuesday, March 27, 2012

Our Home - Part 1

As promised, I am giving you a look into our home! There are two levels to our house; on the upper lever is the laundry room, kitchen, dining room, bathroom, living room, bedroom, and office. On the lower level is two spare bedrooms (one has our pool table), the tool room, and extra storage. 

Many of you have already seen our kitchen from the recent update we did to it, but just to recap, here is our kitchen:


We repainted the cabinets white, painted the walls red, and put the brushed nickel handles on the cabinets. We love it! 

We also put in laminate floors a couple of months ago (and I took no before & after photos!). We used to have linoleum floors that was white and a teal color....it was bad. We just laid the laminate right on top, and it totally warmed up the house!

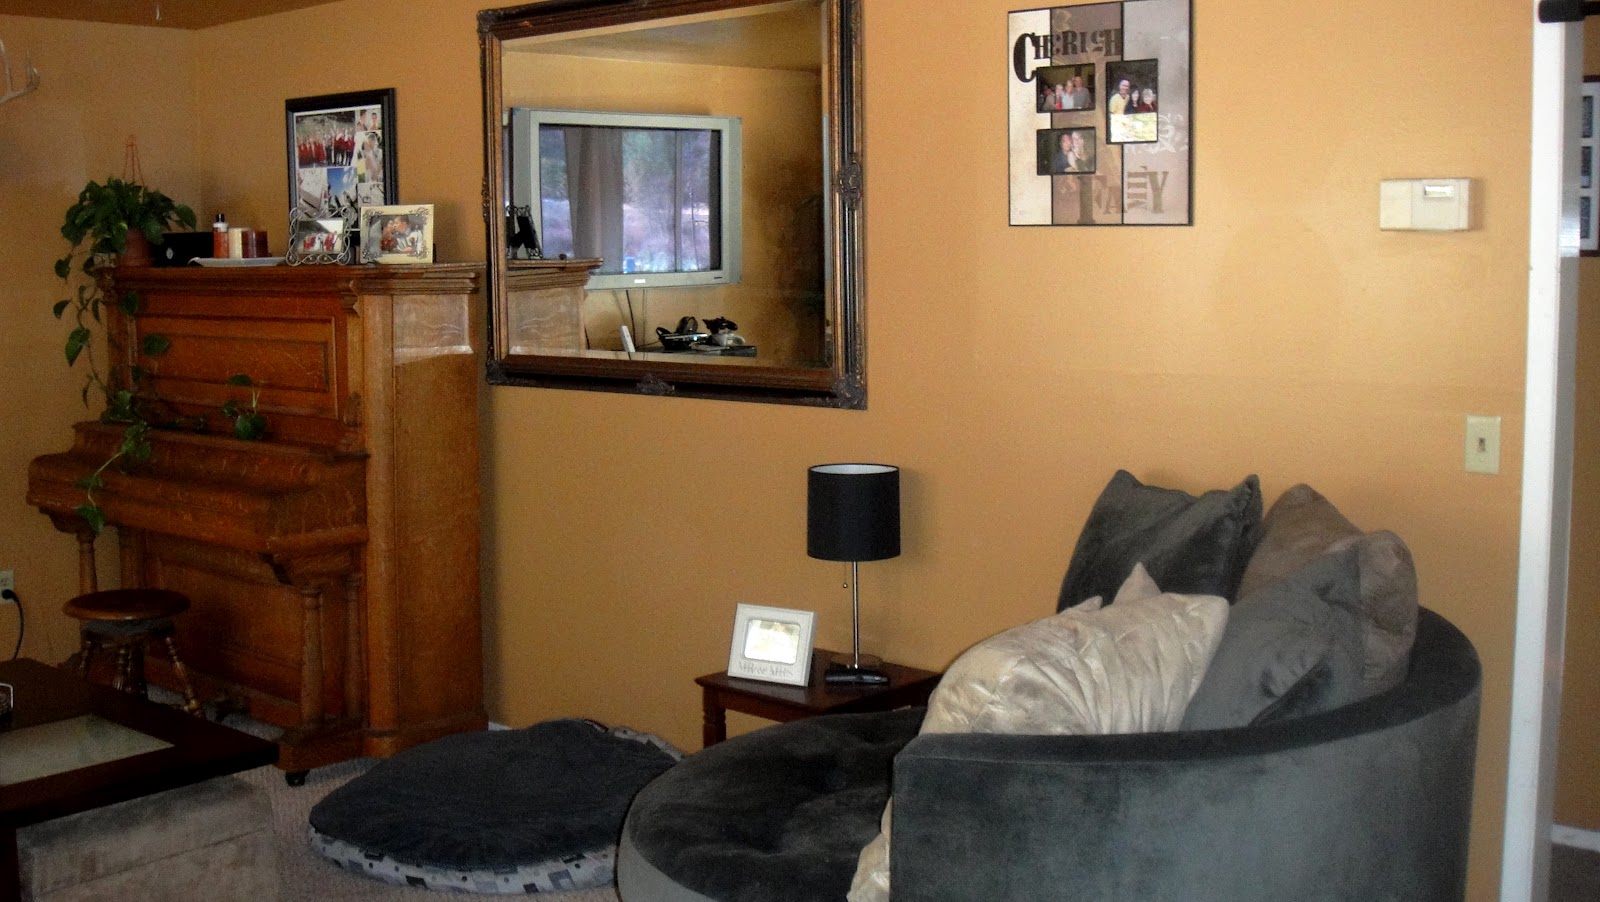
The living room is one of my favorite rooms. We bought a brand new couch and chair in February, so I just love it! I feel like the room is very open to guests.


We have an old family piano in the far corner, a large coffee table in the center of the room, then the sectional couch and my round chair that I super duper love! It's a cozy room to say the least.

Then you enter the hallway (which is to the right in the picture above), which takes you to the bathroom:


We chose to do our bathroom in blue and brown. It flows well from the living room (which is tan, brown, and black, with blue as an accent color).


We got the bath mats and towels from Target, and we got the shower curtain, curtain rod, and the curtain rings from Walmart. Everything was on sale, so we got a super bargain! Over all, the bathroom makeover costed us about $25.

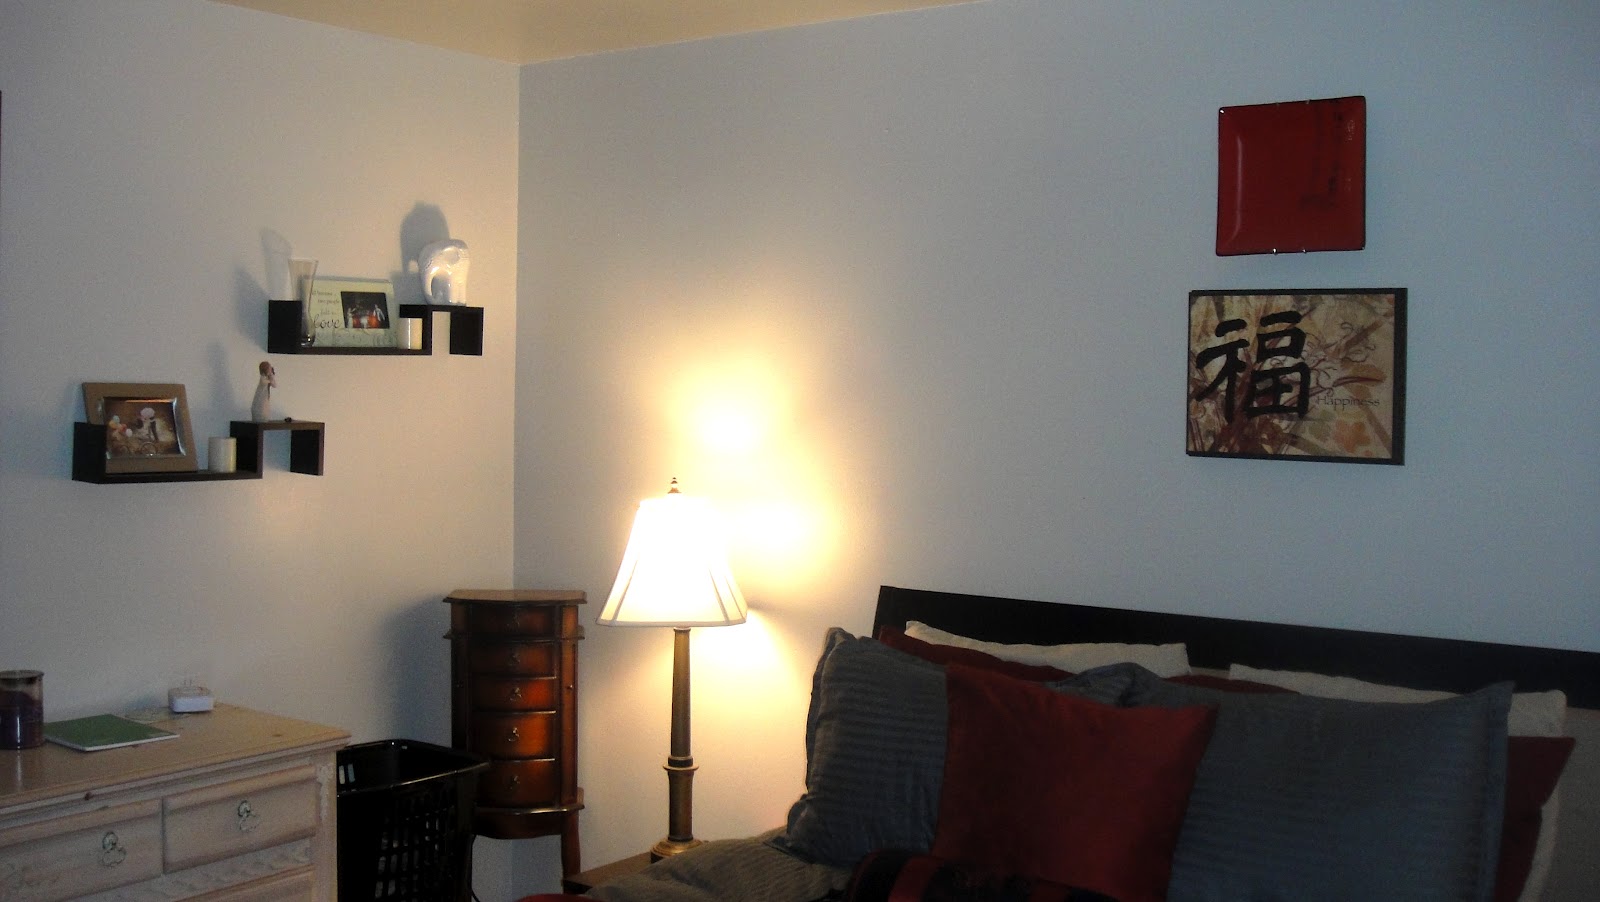
If you enter the door on the left in the hallway, you enter our bedroom...aka, Jenna's sanctuary. I LOVE my bedroom. It's another favorite room in my house. You can't really tell, but the walls are a very light light grey color, which really opens up the room (it's a little small) and reflects natural light wonderfully.


This room is so calming to us. We got a brand new platform bed for our wedding, which was awesome because before that we were using a double-size bed that was my dad's bed when he was younger. Needless to say, we REALLY needed a new bed!
Once again, there is no overhead lighting in our bedroom, as is in the rest of the house, so we got a shelf lamp (on the right) from Target for our wedding and put it in the corner. We use short night stands that are level with our bed. The comforter and duvet set we got from Target as well, and that was one investment that lasts! When the duvet gets dirty, I just take it off of the comforter, wash it, dry it, and put it back on. 


I bought this shelving unit from Walmart, and the baskets are from Target. I had a major problem with scarves filling up random space in my closet, so I got a closet organizer from Lowe's. 


I. Love. These. Shelves. They are on my side of the bed (The window is on the wall on Casey's side). I got them from, can you guess? Yes, Target! They were on sale, so I snatched them right up! The ceramic elephant I got from Michael's.


If there is one thing in life that I love, it's Marilyn Monroe. This poster of her & James Dean caught my eye, so I bought it for $2, bought a cheap frame (probably around $10) and hung it above my dresser. It definitely adds a soft touch to the room!


So there you have it. These are just a few rooms in our home, and I can't wait to show you more! 

Sunday, March 25, 2012

A Fast Organization

When Casey and I moved in together, we had a ton of movies. There is probably close to 200 DVD's in our house! We used to have them stored in a cube shelf under our TV:


But today I thought, "Man, I'd really like to have nice little things in those cubes rather than all of our DVD's." So I decided to move them into our storage-friendly coffee table:


And now we have cubes to put pictures in! It took me all of 10 minutes, and I love it.


Saturday, March 24, 2012

Coming This Week...

After the kitchen project, I had to take a break from improvements. Mostly I have been extremely tired and my husband is sick, AND my parents went out of town so we are taking care of the family business this week! Oh, and school, of course. 

But, after a much-needed week off, I'm going to show you my home! I will take you inside the entire house...and yes, even the scary parts...and let you take a peek into our lives. We have done a ton of updates before I started blogging, so I will explain all of that as I go along through the photos. See you in a few days!

Monday, March 19, 2012

The Last of the Kitchen...For Now

It's been a long and rough week trying to juggle work, school, and the kitchen project. I'm definitely tired! The end result of the kitchen is totally worth it though! I've had so many compliments on how great it looks. We started out with a stark white kitchen: white walls, white cabinets, white hardware on the cabinets. So the first thing we did was update the hardware from the white knobs to the brushed nickel handles:


Then my mom let us borrow some left over paint that she had, so we took off with it!


 I'm not sure why this picture turned out blurry....but we got this cute little cart from my mom as well, and it holds our cereal and pancake mix! Super cute! The wine tasting sign I got as a wedding gift from one of my bridesmaids.
We also added the wine glass rack to create more space in our small cabinets, then repainted the cabinets white, and that was it! 

I want to refinish the countertops because the varnish has worn off, but that will have to wait a while. Casey and I already have plans for the living room, which is our next project! I have said before that I have no overhead lighting, so we are going to install some nice track lighting to really help open up the space. I can't wait to get started and to share!


Friday, March 16, 2012

Grandma's Advice

My grandmother was a very special woman to me. She and my grandfather helped take care of me a lot when I was little, because my parents had a TON of work meetings that I couldn't go to (or fancy vacations!). She always spoiled me, even in my adult life. I miss her terribly...


This was one of the last photos of us taken together. It was 4th of July, about a year before she passed away. She was awesome to say the least!


I used to help her clean her house when I was really little, and she taught me something interesting....
You know how after a long time of use, your dishwasher gets that rusty color on the inside? Or maybe it gets scaly if you have hard water...? 


She used Tang, the powdered drink mix to clean her dish washer! She would put it all over her dishwasher (without dishes in it) and she would run the dishwasher like normal, just no soap! 
When the cycle was done, she'd open the dish washer and it looked brand new. Crazy, right?


For really tough spots, put some Tang onto the rough side of a sponge, and scrub with a little bit of water. Just one of Grandma's tricks to share!

Thursday, March 15, 2012

Kitchen Update

I. Love. My. New. Kitchen. 


It's not done completely, but oh my gosh, it looks pretty darn amazing. Thank goodness Casey helped me paint, because I was ready for things to move along! Want to see? 
First, we hung up our wine glasses that were buried in the very backs of our cupboards.


Then, we bought new hardware for the cabinet and drawers (we used to have the white porcelain knobs, but switched to the brushed nickel handles...love them!).


And now....
We're painting the kitchen red! 

 We only have this one big wall, and under one set of cabinets and around our window to paint, so I thought "why not add some color?" 

We've only done the first coat, so I'll have to wait until EVERYTHING is done before I post more. I want to repaint the cabinets white, finish the red, refinish the counter tops, and get things cleaned up and looking good. It's time to de-clutter! I have told you before that I have a tiny kitchen, so it gets filled up with stuff very quickly.

So there you have it! We're working on getting things spiffy in our humble abode. Check back in a couple of days to see the progress!

Wednesday, March 14, 2012

Uh-Oh...Guess What I Found?

One of my coworkers was cracking up at me a few weeks ago when I was talking about labels...and I realized it was because I get SO AMPED about labels! I love them. There are some cute ways to make your own:  such as templates on Microsoft Office, buying some from an office supply store, or even making your own from scratch (which I love, because you know that no one else in the world has any like yours!). 


BUT! Guess what I found...


World Label, which is a blog FULL of labels! Free ones! O.M.G. There are some amazing labels there. You can download some address labels, "like us on FB" labels, spice jar labels, box labels....labels, labels, and more labels! Take a moment to check them out!


I'm about to start painting the kitchen cabinets....actually, I'm going to primer them with Kilz primer because there is nicotine on the cabinets and appliances (NOT from us), and THEN we will paint them white. Check back again later today or early tomorrow and see our progress!

Tuesday, March 13, 2012

Here is a Sneak Peak of What We're Doing Next...


It was rainy and windy in Western Montana today, so I got to work on a project with Casey...We're updating the kitchen! The whole thing is white (I'm pretty sure it's the ONLY room in the house besides the laundry room that is white), and the cabinets have these white porcelain knobs on them, which looks okay....but not fantastic. We all know how I'm a total Type A, and when I get something in my head, I have to just do it or I will lose my mind. 

Casey and I went to Lowe's (our new fave store!) and we were browsing the cabinet hardware when we came across the brushed nickel handles shown above. The nice part is that these handles were offered in BULK, rather than just singular pieces. Once again, we got these for $2 each (essentially...because they were 10 for $20!), so we bought two packages and one singular piece. 

We've got all of the hardware on the cabinets, but WAIT! Now the cabinets need to be touched up, because there are stains and chips of paint missing from wear & tear! I recruited the amazing Mr. Clean Magic Eraser to help me out with the stains part. Let me tell you, this thing is KING of cleaning...baseboards, fridge and oven handles, cabinets, doors, and anything you can think of! 

So I borrowed some paint from my mom and we're going to paint the kitchen (hopefully tomorrow so we can give an awesome update!) and finish touching up the cabinets. I'm trying to get rid of & condense dishes and pots & pans that we don't really use, because we have next to ZERO cabinet space (wait until you see pictures...tiniest. kitchen. EVER.)

I can't wait to get rolling on this project! Check back later for updates!

Sunday, March 11, 2012

An Easy, Cheap Saturday Project

I have WAY too many wine glasses. I hardly ever use them, and I think it's because they're so hard to get to in my cabinet! All of my wine glasses are buried in the very depths of my cabinets, behind the coffee and coffee mugs. Not only are they taking up extra space, but I REALLY want to use them! We got a really nice set for our wedding 7 months ago, and we never have been able to use them. Here is what my cabinets looked like before:


What's a good way to store them? That's right....under the counter stemware storage! I have been waiting to find the perfect one....and my mom got me two of these from Lowe's:


Okay, here's the best part: They were TWO DOLLARS EACH. What a bargain, right?? I love them! So Casey hung the racks up, and we put our wine glasses in:


We realized that two wasn't going to suffice, so we went back to Lowe's and got two more, hung them up, and voila! Absolutely beautiful, and classy, all while keeping our cabinets nice and tidy. $8 for a less cluttered cabinet and more useful way to store wine glasses. Enjoy!


Monday, March 5, 2012

Awesome DIY Projects

Everyone seems to be raving about Pinterest right now, and I have to admit that I am too! The crazy thing is, there is a website called Instructables that is just like Pinterest, but better! It has been around for a long time, and it's ALL DIY projects...which I love! You can find pretty much anything, from making origami to reupholstering furniture. It's amazing!

Here are a few projects that I love from Instructables:


How to Remove Grease Splatters & Gunk - and look what product she suggests...Mrs. Meyer's clean day!


How to Store Bobby Pins

and


An Eco-Friendly Way to Clean a Kitchen Sink

These are seriously some awesome projects....I could never have enough time to go through Instructables though! I love love love this website, so hopefully I have opened your eyes to some amazing projects as well!!

Sunday, March 4, 2012

Here is Something That I Love!

You know what I love? Besides organizing? 

CLEANING. Holy moly, the second best thing is cleaning! And I come home from school every single day and I clean! Clean my kitchen, my bedroom, my laundry room...you get the idea.

So the THIRD best thing is....cleaning products! I love cute cleaning products, innovative cleaning products, smell-good cleaning products (especially)! I especially love Organize.com'sMrs. Meyer'sMethod's, and J.R. Watkin's cleaning products! The best part is that all of the above products have different scents in the same product! Don't like lavendar? Try lemon! Don't like lemon? Try pine!

Organize.com is my heaven, by the way. They have great ideas, and a great list of cleaning tips and checklists. I visit this page a TON. They have great items and ideas for major cleaning, and they also give ways to de-clutter! I love the kitchen page because I have a teeny-tiny kitchen that is easily cluttered with small appliances and utensils. 

For my counter tops, I use J.R. Watkins lemon scented all-purpose surface cleaner (and occasionally Lysol wipes). This is my favorite of all favorites....Not only does it smell delish, but I use it on my granite counter tops, then I use it on my back splash, then my dining room table, then the window sills, and so on...
It's just fantastic because it is multi-purpose, so I don't have an overload of cleaning products for every surface in my home!


Wednesday, February 29, 2012

The Perfect Hand Scrub!

HOLY. GREATNESS.


I have finally figured it out! I have a major problem with dry hands in the winter. Only the winter though! I read that it's because my pores close up to help protect from the cold, and in turn my body doesn't secrete the natural oils that keep my hands soft. 


Here is how to do it: (I'm so excitedddd!!!)


Step 1: Mix 2 cups of sugar with 1 cup of oil. I'm using extra virgin olive oil, but I think that baby oil would work best.


Step 2: Add whatever scent you want! For vanilla, add 1 tsp. of vanilla. For lemon, mix 1 tsp. of lemon extract or lemon oil to the oil you're using, and then mix with the sugar.


Step 3: Can it. That's it! Then, use your yummy smelling scrub whenever your dry hands are calling for it!

How to Organize

I have a problem. Actually, a few problems. My house is constantly getting cluttered by all of the stuff that my husband & I bring home. I KNOW how to organize, it's just a matter of the time commitment!


So, here are a few ways to organize....First of all, if you have a space or room that is cluttered, here are some easy steps to take care of that:


1.  Throw stuff away. Seriously, do you REALLY need that birthday card from last year? What about that thing that broke 7 months ago that you're going to fix? Make some serious decisions here! Do you NEED it? Do you LOVE it? Will it make you money? The fact is, if you haven't looked at it or touched it (except to move it out of the way) in the last year, it needs to go. 


2. Put it away. The hubs will tell you this much: according to Jenna, everything has a place. When everything has a place, and is PUT in its place, it's much easier to find, use, and put back away! How often do you just throw stuff on top of stuff on top of stuff and they say "Where the heck is....????!!" If you put it away, you will know exactly where to find it.


3. Label. Label. LABEL. Honestly, I like labels. Actually, it goes beyond liking: I HEART LABELS! After you have thrown the unwanted out, and everything is put in its place, label it. Labels are ESPECIALLY important for bins, boxes, baskets, etc. I say this because we have all done this: grab a bin down from the verrrrry tippy top of the storage closet, and it's not what you want. So frustrating! There are many ways to make labels or you can buy some super cute ones, too. I think my favorites so far are the baskets with chalkboard labels from Target. There are desk organizers with chalkboard labels, and also file boxes with chalkboard labels from Target. Another option is to reuse those bins, baskets, and boxes and make your own chalkboard labels with chalkboard paint from Lowe's. You can make labels on your computer with Microsoft Excel or Word, or you can order some from places like organize.com, which is one of my most FAVORITE websites. Also try Etsy...that way, you can have them personalized.


Now, after you have organized your space, you can leave it all be, right? Wrong. I have organized, reorganized, and started over from scratch to organize spaces. I always come back to this: Why does it always come back to being messy? We put stuff back where it belongs. I realized it's because of our lack of time. I go to school full time, and I work two jobs. My husband works two jobs as well, so we are just WAY too busy to be constantly cleaning. So here is my solution to that:


Make a schedule. I mean, literally write out a cleaning schedule: who does what when, how often, etc. You can go to any store such as Walmart and buy a regular list notepad, or you can go as far as ordering personalized ones (I did!) from people like Jen Jones, of IHeart Organizing


Now, I can look at my list and know for sure that tomorrow I need to vacuum after school and before work, I need to clean the bathroom and do laundry on Sunday, Casey needs to clean the office on Saturday, and so on. It's such a great way to keep track of things! And, you can just glue some magnets onto the back of your list and hang it on the fridge! That way, you won't lose track of it.


I hope that these tips help out with future organizing...just remember, if all else fails, take a deep breath and just go through one item at a time!


Have fun!!

Sunday, February 26, 2012

Wedding Idea #3: Unity Sand

The laundry room has come to a halt for the moment (we are planning on building some cute shelving!), so I thought I'd at least share with you some other great ideas we had for the wedding.


The first is the unity sand. I wanted to do a unity candle, but because we got married outside, we ran the risk of the candles blowing out! So we chose to do a unity sand set instead. First, we ordered the set from Wedding Star, which is where we got a TON of stuff-like our cake toppers ("C & J"), cake serving set (they engraved them too!), and it is another wedding mag that I lived by for a year.


When we ordered the unity sand, we had many options to personalize it (which is why we loved Wedding Star!). We had it engraved, which was beautiful, and we also ordered sand in our colors with it! So worth the extra $9 or whatever!!


Copyright August Light Photography

Here is how we did it:
You can look up all kinds of different ways to do a unity set, but the way we did it was we left it empty until after we did our vows and ring exchange. Then, my now brother-in-law poured the base sand, which was an off-white. Then we exchanged a few lines, and I poured part of mine, then Casey part of his, then part of mine, then part of his, and then we poured ours at the same time. That's to signify that two become one (and the whole time we had "Better Together" by Jack Johnson playing in the background so it wasn't just silent).


Sorry about the poor lighting in these pictures-there is NO overhead lighting in any room in my house besides the kitchen and dining room!
Anyway, these are the 3 bottles for the sand. The small one was for the base, and it had a large "C" on it for Callison. Mine had a "J" and Casey's had a "C."


I love these, because they are heart-shaped! And so is the container that holds the sand:


You can't see the small C on the left, and I apologize again for the crap lighting in my house, but basically it's a small C, then a large C, then a small J. Underneath the letters is 08.06.11, which is our wedding date. Isn't that pretty?? And it came with that stand!


I was just in Michael's the other day and I happened to pass through the wedding isle, and they sell this in there now! It's probably much cheaper than it was on Wedding Star, and you can buy different colors of sand there, too. However, if you want it engraved, (we also had our cake serving set engraved) then I would order it from Wedding Star. It takes a couple of weeks, so don't hesitate!

Wednesday, February 22, 2012

More Wedding Things!

While I work more on my laundry room update, here are some wedding photo ideas (some of my favorites):
 Copyright August Light Photography

Copyright August Light Photography

We were lucky enough to have my sister-in-law around to do my beautiful bouquet! She owns her own flower shop, and my mother-in-law was a florist for like 25 years, so I got an AMAZING bouquet for cheap! Thanks ladies!

We were also lucky enough to have a beautiful day! It had rained literally ALL SUMMER up until about a week before the wedding. Then, the skies parted and we had this beautiful sunshine. I love Big Sky Country!