Showing posts with label wedding. Show all posts

Sunday, February 26, 2012

Wedding Idea #3: Unity Sand

The laundry room has come to a halt for the moment (we are planning on building some cute shelving!), so I thought I'd at least share with you some other great ideas we had for the wedding.


The first is the unity sand. I wanted to do a unity candle, but because we got married outside, we ran the risk of the candles blowing out! So we chose to do a unity sand set instead. First, we ordered the set from Wedding Star, which is where we got a TON of stuff-like our cake toppers ("C & J"), cake serving set (they engraved them too!), and it is another wedding mag that I lived by for a year.


When we ordered the unity sand, we had many options to personalize it (which is why we loved Wedding Star!). We had it engraved, which was beautiful, and we also ordered sand in our colors with it! So worth the extra $9 or whatever!!


Copyright August Light Photography

Here is how we did it:
You can look up all kinds of different ways to do a unity set, but the way we did it was we left it empty until after we did our vows and ring exchange. Then, my now brother-in-law poured the base sand, which was an off-white. Then we exchanged a few lines, and I poured part of mine, then Casey part of his, then part of mine, then part of his, and then we poured ours at the same time. That's to signify that two become one (and the whole time we had "Better Together" by Jack Johnson playing in the background so it wasn't just silent).


Sorry about the poor lighting in these pictures-there is NO overhead lighting in any room in my house besides the kitchen and dining room!
Anyway, these are the 3 bottles for the sand. The small one was for the base, and it had a large "C" on it for Callison. Mine had a "J" and Casey's had a "C."


I love these, because they are heart-shaped! And so is the container that holds the sand:


You can't see the small C on the left, and I apologize again for the crap lighting in my house, but basically it's a small C, then a large C, then a small J. Underneath the letters is 08.06.11, which is our wedding date. Isn't that pretty?? And it came with that stand!


I was just in Michael's the other day and I happened to pass through the wedding isle, and they sell this in there now! It's probably much cheaper than it was on Wedding Star, and you can buy different colors of sand there, too. However, if you want it engraved, (we also had our cake serving set engraved) then I would order it from Wedding Star. It takes a couple of weeks, so don't hesitate!

Tuesday, February 14, 2012

Wedding Idea #2: My Veil!

My big day was approaching, and I still hadn't found a veil.


Well, that's a lie.


I had found one at the same boutique that I bought my wedding dress, but it was TWO HUNDRED DOLLARS. Seriously? I couldn't stomach buying a veil for $200.


So, we made one. By "we" I mean my mom and my aunt and I. I described exactly what I wanted, and my aunt (who is a sewing GODDESS...she made my bridesmaids dresses AND my veil AND my flower girl's dress.) got to work.


I wanted a veil that was one piece. I wanted a blush veil, but instead of TWO pieces of fabric, I wanted one. So we cut a piece of the veil material that I wanted into an hour glass shape, so that the sides came up just below my shoulders, and the back of it to about my tailbone. The front came down just to my midsection. 


My aunt made a beautiful scalloped lace embroidery on a separate piece of tulle, then my mom and I very carefully (painstakingly, more like) sewed the embroidery onto the bottom of my veil. We then bought flat-backed pearls and rhinestones (from Michael's) and glued them onto my veil sporadically on both sides (remember, I had a blush veil so they had to be on both sides of the tulle so when my dad flipped it back...you get it?). 


This took FOREVER, but it was seriously perfect! It looked almost exactly like the one I had wanted at the boutique, and it cost us about $50 to make all together. 


Here is the end result:


Copyright August Light Photography

(That's my mom and I when we were getting ready for the wedding) Okay, so see what I mean by the veil being one piece? Instead of have a blush veil as one piece, then the back part one piece, it's all just one! It's classy and timeless.

Copyright August Light Photography

There is a close up of the scalloped lace! Beautiful! It took us forever to make, but it was so worth it in the end, and it also was more than just a veil. It was a veil that my mom and aunt and I made together! 


Here is a picture of the front. See how it comes down just to my midsection? You can kind of see the back...it comes to just about my tailbone. 

The good thing about doing the scalloped edge lace was that it weighed my veil down, so the breeze didn't just blow it around. It was the perfect veil, especially for an outside wedding! 

Here are some good links to help you get started on YOUR perfect veil:

Save On Crafts - This website is A-M-A-Z-I-N-G! Not only does it have cheap tulle and combs, it's got all kinds of ideas for weddings! We bought garden stakes to go down the isle from here, as well as a bunch of Japanese lanters for the reception.

Crafty Stylish - This is also a great website for ideas. There is a whole page on wedding veils and how long to make them, what combs and tulle to use, etc.

Real Simple Weddings - I absolutely ADORE this website. Wedding cost calculators, how to pick your wedding colors, and even bridal shower games are on here! I lived by this website and their magazine for about 11 months before the wedding.

The Knot - This is another one that I lived off of for almost a year! There is a ton of great ideas, and they also have a magazine (sold at any Barns & Noble) that is like a wedding NOVEL. After you get married, check out The Nest, for married couples (they've got good recipes, organizing ideas, decorating ideas, etc.) and for when you have children, check out The Bump. 


Monday, February 13, 2012

Wedding Idea #1: The Candy Table!

My mom and I literally put together my ENTIRE wedding ourselves, minus the flowers and wedding cake! We bought wedding magazine after wedding magazine and researched endlessly to put together the perfect day for my husband and I. Let me tell you, my mom missed her calling for wedding planning and interior design! 

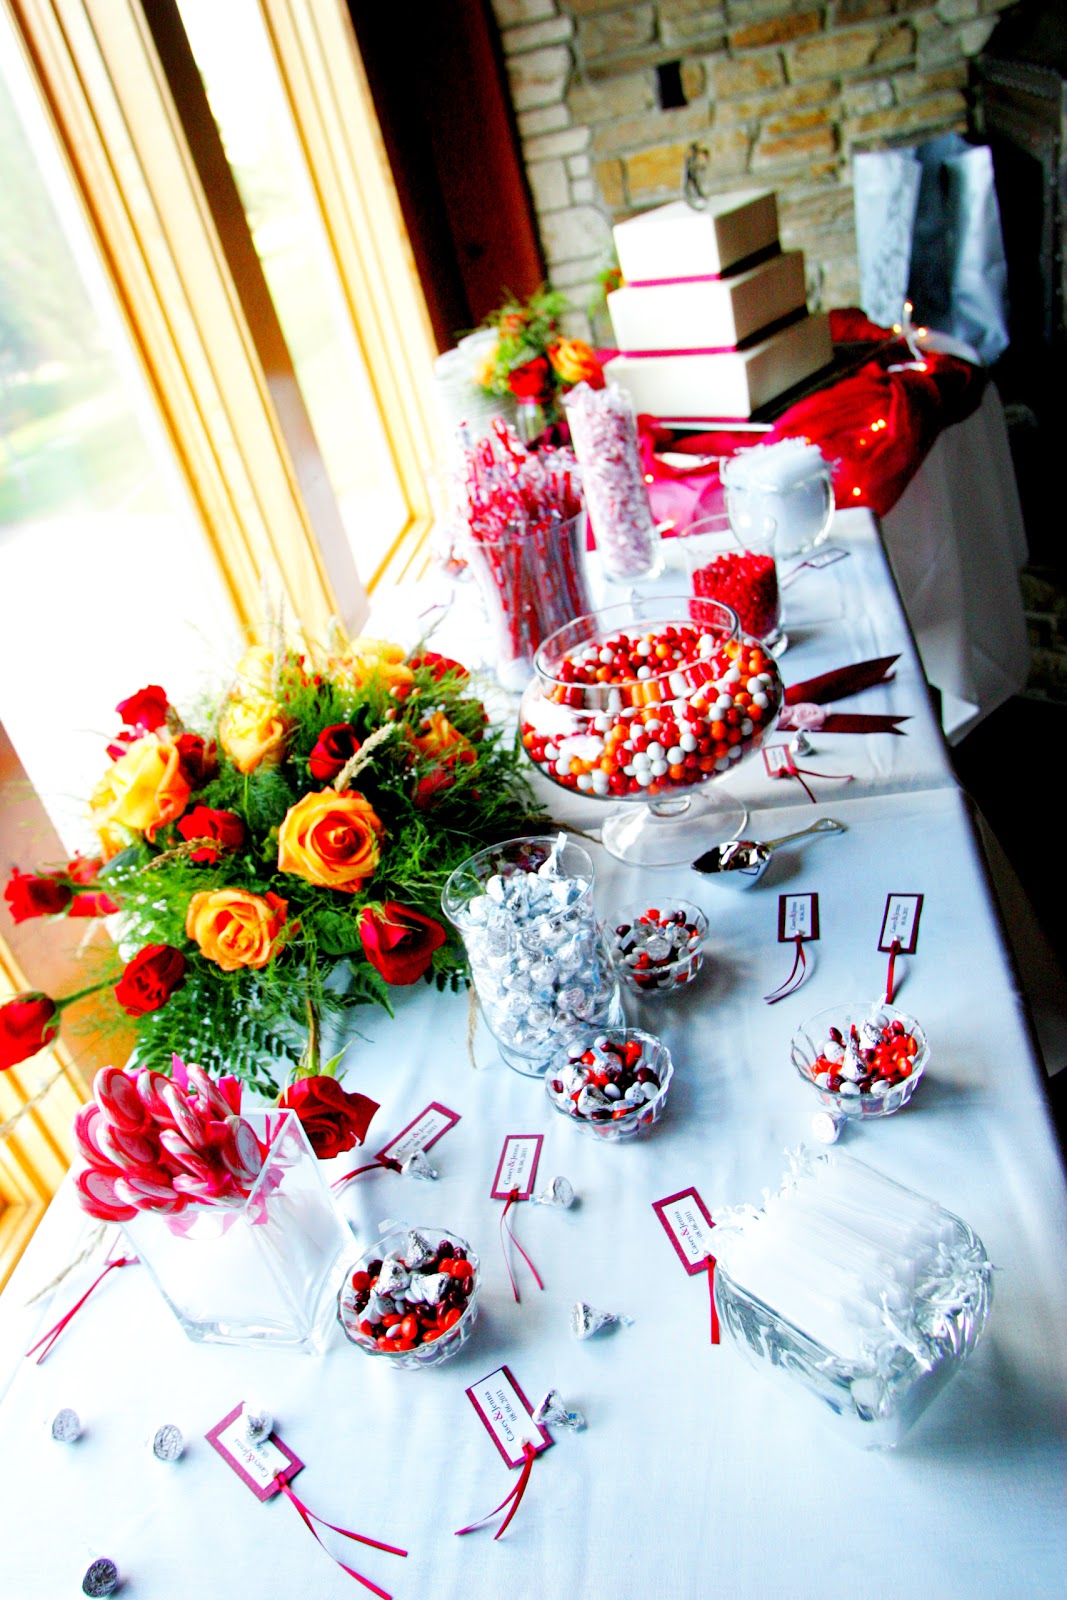
We didn't want our guests waiting forever for us at the reception while we stopped and took photos, so my mom came up with an awesome idea -- set up a candy table.  We bought Hershey's Kisses in silver and red (my wedding colors were red and dark orange), lolly pops, candy canes, mints, gum balls, and a TON more candy, including personalized M&M's with our names and wedding date. It was a huge hit. We went to Michael's and found apothecary jars to put the candy in, and we also put a few Kisses on the table with our tags (shown later in this blog). Here are some pictures of the candy table:


Copyright August Light Photography

Copyright August Light Photography

Copyright August Light Photography


How we made the tags:
We did a label template in Microsoft Word, picked the font type, color, etc. and printed it onto glossy photo paper. Then, we glued the glossy paper onto some scrapbook cardstock (which I think we found at Michael's also), then punched a hole through it, tied a ribbon through the hole, and glued a flat-backed pearl onto the hole so you couldn't see it. (We found the ribbon and the pearls at Michael's as well.)


This was an easy and fun way to keep guests entertained while the wedding party took photos. It's great for any occasion: birthday, anniversary, or even just a small get together!